Have you ever wondered how people built wooden sailing ships in the sixteenth and seventeenth centuries?
The process seems, on the face of it, a pretty straightforward procedure. After all, though a great deal of manual skill was involved in the actual carpentry, the design of sixteenth and seventeenth century sailing ships was quite simple: like building a giant wooden rowboat and then sticking decks and masts and sails on it.
It’s easy enough to imagine how things worked. First, the shipwrights would work out the ship’s design and dimensions in a series of drawings, or make use of somebody else’s already-existing drawings. Next, they would translate those written-down plans—the blueprints, essentially—into the actual ship.
The reality of the process wasn’t that simple, though. Building a ship back then was a much more ‘seat of the pants’ affair. Shipbuilders made some use of plans, but a lot of the designing and construction seems to have been done by a combination of basic principles and simply eyeballing the result.
The basic principles involved a series of measurements based on the keel—which gave the length of the ship—and the desired width (known as the beam). An experienced shipwright could take these measurements and, using a set of standard proportions, work out the lines of the ship. It was possible to do this without ever putting (quill) pen to paper.
The clearest way to imagine how the construction process worked is to go through the steps, one by one.
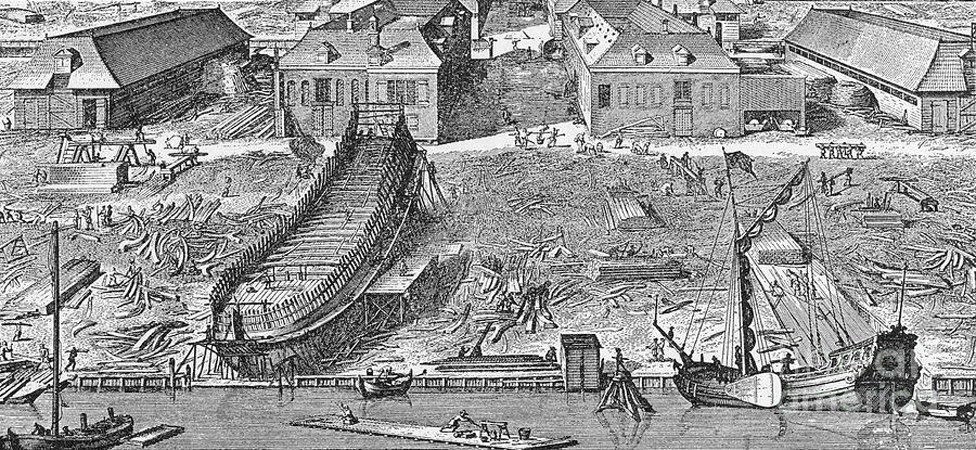
Ships were built in shipyards. The larger ones were noisy, hectic places. It took dozens of men all working cooperatively to put a ship together, and in a large yard, there might be several ships being constructed simultaneously, each at different stage of completion. This meant there could be a hundred or more men at work simultaneously. (The illustration above shows a shipyard with a single ship in it under construction.)
To begin work on a ship, the shipwright initially had to claim a space in the yard.
The first step in the construction process was then to lay out on the ship’s keel. The keel was the backbone of the ship—a single long beam to which everything else was attached.
In the series of illustrations that follow below, the ship being constructed is a caravel. Caravels were widely used from the fifteenth century up until the eighteenth. Christopher Columbus’s ships were caravels. Bartholomew Diaz, the Portuguese explorer who, in 1487, first rounded the Cape of Good Hope at the southern tip of Africa and opened the way for the Portuguese exploitation of the East, did so in a caravel. Ferdinand Magellan, whose expedition of 1519-22 was the first to circumnavigate the globe, also used the caravel. Caravels were employed so widely because they were dependable, easily maneuverable, seaworthy craft. They came in varying sizes, anywhere from 50 to 100 feet in length, but most were smaller rather than larger.
Caravels were popular with Barbary corsairs, many of whom needed sturdy, dependable, medium-sized vessels. Loaded with cannon and a heavily armed crew, a caravel made a formidable pirate ship.
Caravels are also useful ships to employ here as an example of the shipbuilding process, for they had simple lines and were pretty much just scaled-up rowboats with decks and sails.
The illustrations below show the various stages in the construction of a caravel. When it is completed, the caravel depicted will be close to 90 feet (27 meters) long from stern rail to bow.
Keels were made from single trees. Carving up a tree bole to create a smooth, straight bean not only took a lot of hard work; it took skill too. First, the rough beam shape was hacked out using axes. Then the surfaces were carefully shaped and smoothed using adzes—an adze looks a little bit like a hoe and is used to work on the surface of a piece of wood rather than to chop through it.
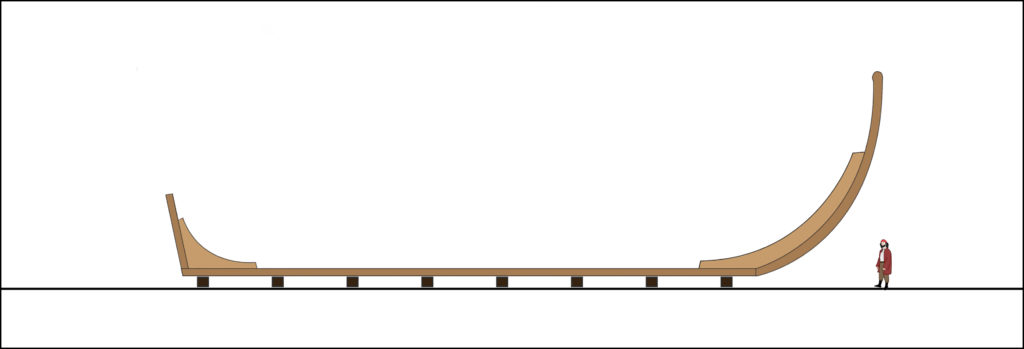
When it was finished, the keel was lifted up onto a line of blocks.
Below, you can see the caravel’s keel laid out on the blocks on the ground. The human figure is given for scale. The keel is about 65 feet (20 meters) long.

Once the keel was laid out, the next step was to add the stempost and the sternpost. The keel was the bottom of the ship. The stempost was the frame for the curved front part—the bow. The sternpost was the frame for the rear—the stern. Like the keel, the stempost and the sternpost were laboriously hacked out of large trees. Heavy blocks called deadwoods, carefully carved to shape, were installed to brace the joints between the stempost and the sternpost and the keel.
You can see all this in the illustration below.
Now that the basic longitudinal spine of the ship was in place, the next step was to fashion the ribs—the framework on which the planks of the hull were attached.
 In a small vessel like a canoe, builders simply bent the ribs into shape. The timbers for a larger ship are far too massive for bending, though. Instead, they were carved. It was impossible to carve the half-circle shape of a large curved rib from a single tree. So the ribs were built in three parts: a lower supporting frame known as a “floor,” and two curved uprights known as “futtocks.” The futtocks were bolted onto the floor, and the floor was bolted onto the keel. Often, a drainage hole was slotted into the underside of each floor so that the partitions between ribs didn’t fill up with stinking bilgewater. You can see all this in the illustration at the left here.
The various parts of the ribs were carefully carved out on the ground from individual pieces of lumber and then attached together and lifted into place on the keel. To hold them firmly in place, a long, solid piece of wood known as a keelson was laid over the floors where they attached to the keel. The keelson was carefully notched so that it fitted exactly over each individual floor. It was then bolted onto the keel. This made for a stronger, more rigid structure. The illustration below shows the caravel’s structure so far: keel, sternpost (with a transom attached to it), stempost, ribs (floors and futtocks), and keelson.

The caravel depicted in these illustrations wouldn’t have been a particularly large ship for the time, but as you can see, it was still pretty large on a human scale. Hacking out the shapes of the keel or the ribs, setting the stempost accurately in place, lowering the ribs into position—it all took skill and muscle. There were no machines at this time, remember. Everything had to be done manually. It was a slow, demanding, painstaking process.
The next stages in the construction of a caravel are contained in Shipbuilding in the Sixteenth & Seventeenth Centuries – Part 2 here in this blog.
 The Travels of Reverend Ólafur Egilsson
The story of the Barbary corsair raid on Iceland in 1627
Amazon listing